Showing posts with label with. Show all posts
Showing posts with label with. Show all posts
Thursday, February 13, 2014
Interview with plane maker Steve Knight Fine Woodworking
Steve Knight makes, or used to make, really nice wooden hand planes. Now he makes them as kits; super high quality. Here is an interview from Fine Woodworking and Steve where he talks about that transition from finished planes to kits...

Monday, February 10, 2014
MBR Ideas with Sketchup and Photoshop
I use Photoshop and Sketchup a lot when I am designing anything 3D. Sketchup is a quick and fast way to get and idea of spatial relationships and what scale of furniture will work in the space. Photoshop allows manipulation of the space i.e. what wall art will look best, colors, etc.
When deciding what the depth of the new demilune table would be I used Sketchup to help me decide.
Check out this post for more info on the table
I created this model in Sketchup when I began designing the MBR, and have used it along the way to help make decisions.
Can 2 inches make a difference? In a smaller space yes! I am liking the clearance of the 12" depth, but I like the scale of the whole table with the 14" depth. I am still deciding ...
Without Sketchup, it is helpful to tape off the area to get a sense of how much space an object will take up.
I have also been thinking about what I will put on the wall with the bed - I used my Sketchup model and Photoshop to come up with some ideas

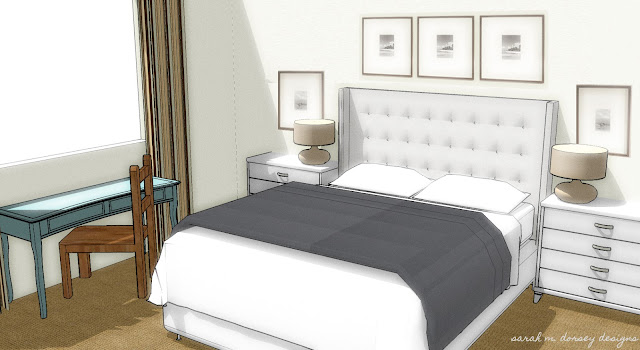
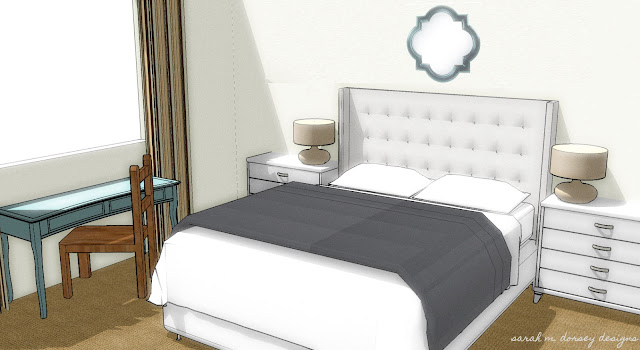
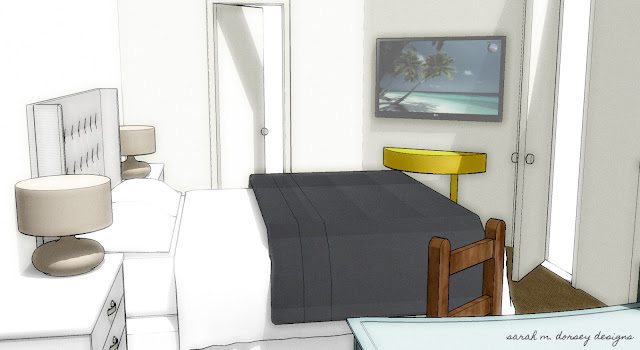
Here are some examples of how I used a photo and Photoshop to decide on fabric and headboard when shopping online
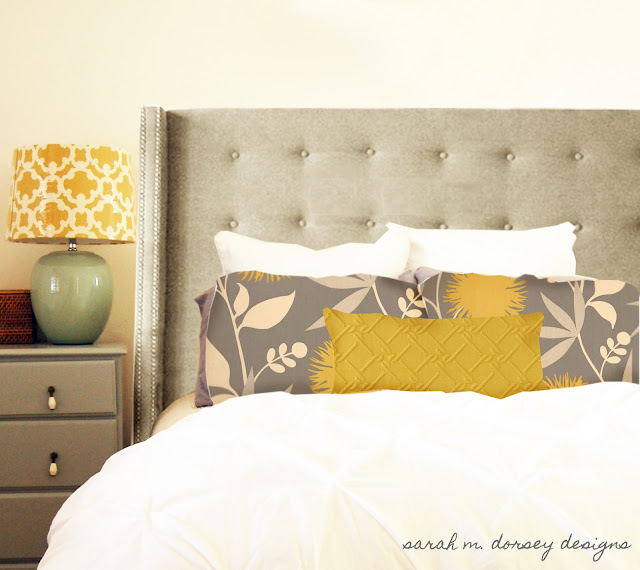
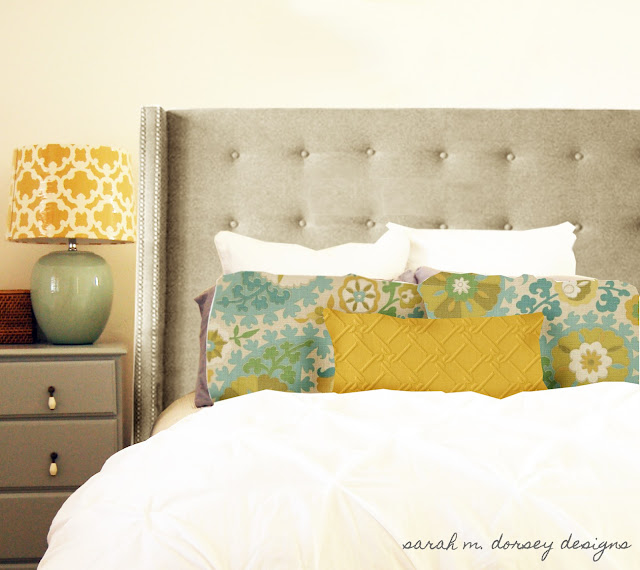
If you havent noticed ... I really like Photoshop and Sketchup, they make it easier to make decisions when shopping online!
The bedroom is getting there, I have to:
1. Finish tv table (this weekend)
2. Make headboard (when fabric comes, next week?)
3. Refinish desk and chair
4. Swap light fixtures
Hope you have a great weekend!
Read More..
When deciding what the depth of the new demilune table would be I used Sketchup to help me decide.
Check out this post for more info on the table
I created this model in Sketchup when I began designing the MBR, and have used it along the way to help make decisions.
 |
| 12" table depth |
 |
| 14" table depth |
Can 2 inches make a difference? In a smaller space yes! I am liking the clearance of the 12" depth, but I like the scale of the whole table with the 14" depth. I am still deciding ...
Without Sketchup, it is helpful to tape off the area to get a sense of how much space an object will take up.
I have also been thinking about what I will put on the wall with the bed - I used my Sketchup model and Photoshop to come up with some ideas
 |
| Butterfly wall art -reminiscent of gossip girl? |
 |
| Frame Collection |
 |
| Quatrefoil Mirror |
Here are some examples of how I used a photo and Photoshop to decide on fabric and headboard when shopping online
If you havent noticed ... I really like Photoshop and Sketchup, they make it easier to make decisions when shopping online!
The bedroom is getting there, I have to:
1. Finish tv table (this weekend)
2. Make headboard (when fabric comes, next week?)
3. Refinish desk and chair
4. Swap light fixtures
Hope you have a great weekend!
Monday, January 27, 2014
Art Options created with Photoshop
Yesterday I worked on creating some Photoshop sketches of art for above the headboard
Here are some options that I came up with ...
Images printed on canvas/drop cloth -
Pattern created with puffy paint on canvas: (pattern reminiscent of table lamp shade)
Or text connected with lines:

Lots of options! The images above arent exact representations of what it would look like, but it does give me an idea of scale and how the images interact with the rest of the room.
Opinions? I am going to try to make a decision today ...
I am off to purchase some frames!
Read More..
Here are some options that I came up with ...
Images printed on canvas/drop cloth -
 |
| lower image saturation |
 |
| higher image saturation |
Pattern created with puffy paint on canvas: (pattern reminiscent of table lamp shade)
 |
| ivory |
 |
| yellow |
Lots of options! The images above arent exact representations of what it would look like, but it does give me an idea of scale and how the images interact with the rest of the room.
Opinions? I am going to try to make a decision today ...
I am off to purchase some frames!
Thursday, January 23, 2014
Mystery Mallet With Roy Underhill
What? Its the end of November already! Okay, okay, heres the Mystery Mallet post that was supposed to be up about three weeks ago! Sheesh!
In an effort to actually post this tonight, Im going to keep the text to a minimum. This class was the Saturday after the Friday dovetail class. It was quite a bit smaller, and more relaxed, for me anyway. It was awesome!
The Mystery Mallet - of myth and legend - dovetailed in all directions, guaranteed to never come apart - or go together...

The beginnings of mine. Roy provided the stock, with the hickory (or was it ash?) handle already turned.

The first through mortise:

The double rising dovetails:

Jonathan, wielding his fantastic Wenzloff tenon saw:

The completed mallet head - bottom view:

And top view:

The Master, fine tuning a handle:

Due to the crazy stresses involved in assembly, clamping the handle to reduce the chance of epic failure is advised:


Layout complete - starting on my handle:

And the handle complete:

Roy, and Scott driving Scotts handle home with his "Osage Commander". His survived and gave hope to all still laboring in fear of heading home with jagged shards in a box as the days final outcome.

My handle and head ready to go!

Roy giving my work the once over:

A very trusting Woodwright and El Kabong!

Success! Yeah baby!

Mugging in triumph!

The best day in a long, long time!
Oh, and one more shot of the mallet after cleaning it up a bit:

Wednesday, January 22, 2014
Covering a Lampshade with Fabric Tutorial

Adding fabric to a lampshade is easy and one of my favorite ways to personalize a space.
What you will need:
1. Lampshade
2. Fabric (about 1/2 yard per shade - 54" width fabric (maybe less) - I would use a heavier weight fabric, this is a duck cotton which worked well - an indoor/outdoor fabric would work even better because of its stiffness
3. Craft glue
4. Tape (to temporarily hold fabric until glue dries)
5. Ribbon for trim
I started by cutting the fabric the exact height of the shade
Start at the seam on the shade, apply a thin layer of craft glue on the edge and adhere the end of your fabric

Use tape to hold in place (make sure to press down hard because you will be pulling tight!
Go around the shade pulling tight and applying tape at the edges to help hold in place (it is helpful to have another pair of hands to help hold in place)

When you get to the other end - fold the end and iron to get a crisp line - apply a thin layer of glue and use tape to hold in place.

I used bias tape for the trim - normally I use ribbon but couldnt find any that I liked - so decided to give this a try! When selecting trim, make sure to bring a sample of the fabric to hold underneath to make sure you cant see the fabric through the trim.

Trim any excess fabric off of the edges of the shade with sharp scissors

Starting at the fabric seam - place the trim slightly under the fabric fold - working in small sections, apply a thin layer of craft glue to the edge and then apply the trim slightly past the fabric to hide the edge - pull tight and tape as you go to hold the ribbon until the glue dries - when you are at the end, fold the trim under the pressed fabric fold and glue in place.
Reattach the shade and you now have a one of a kind lamp!

If you havent already, make sure to enter for a chance to win a copy of Flea Market Finds with Matthew Mead!

Subscribe to:
Posts (Atom)